Virtual Reality Development
Developing for Virtual Reality is a new and interesting challenge, and I've recently had the pleasure of using VR for my undergraduate dissertation project!
The 2021/2022 university year was the final year of my undergraduate course at The University of Sheffield. Over the year I was tasked with completing my dissertation project along with my other modules. I missed the chance to accept one of the proposed projects from the Computer Science staff, so I was left to propose my own project, which was exciting but pretty daunting at the same time. Early in 2021 I’d gotten an Oculus Quest 2, and got into the idea of developing something for VR - this was my perfect opportunity. So I proposed the idea of making a virtual reality simulation. Originally I wasn’t sure what to make it on, until one of my friends suggested Special Relativity, which seemed like a good idea as I’m interested in physics, and I had two housemates studying it. The perfect arrangement!
Contents
There’s a lot to read in this post, so I though this might be useful. Click a section to immediately jump to it.
Where to Start?
At first I felt a little lost, as development tools for VR are still somewhat sparse, but after a while, I realised that Unity has probably the best support I can get for such an undertaking. So I started with some tutorials on how to develop for VR, as well as looking at the Oculus documentation, as well as Unity’s XR Development Toolkit, which I would definitely recommend to anyone looking to start VR development. It’s very user friendly, and you can take a look at it here (and if you’re looking for the Scripting API, click here). After making a start with the Unity tutorials, I felt ready to start on my own project. I then began my research on the effects of Special Relativity, and started planning how I could simulate this accurately in VR.
If you’d like to read about the aspects of special relativity that I made use of, take a look at this post.
Overview
The plan for the project is to have a realistic simulation of the effects of special relativity while in virtual reality, and encourage the player to learn how to manipulate the effects by having them pass through puzzles of varying difficulties. This should give the player a challenge while pushing them to learn more and more. There will also be a sandbox area at the end to allow them to experiment more freely.
Design
Part of what makes VR development unique from traditional methods is that the player character needs a lot more moving parts to be functional. Each controller is its own unique object and needs to be able to move with the player and act on their own. As well as this, the head needs to be tracked so that the camera(s) can follow where the user is looking. All of this adds up to make the whole player character much more complex for the same result. In-game locomotion is vastly different too, as most VR systems use teleportation to move around the world, with the option of moving with the thumbsticks. Teleportation is preferred as it may be slightly more disorienting, but it is much less likely to cause motion sickness for the user. This means that each traversable area needs to have a script to allow it to support the user’s movement, and each controller will need to have a script to allow the user to aim and activate the teleportation, and a separate script to support the other method if it is being used. The world itself needs to be made with a VR player in mind, as it is possible they may not be able to reach certain objects, or have sufficient room to perform specific actions in real life. This adds to the complexity of the design, but is not so much that it should deter a developer, as once these areas are covered, the rest is rather similar to the more traditional methods of development.
Player
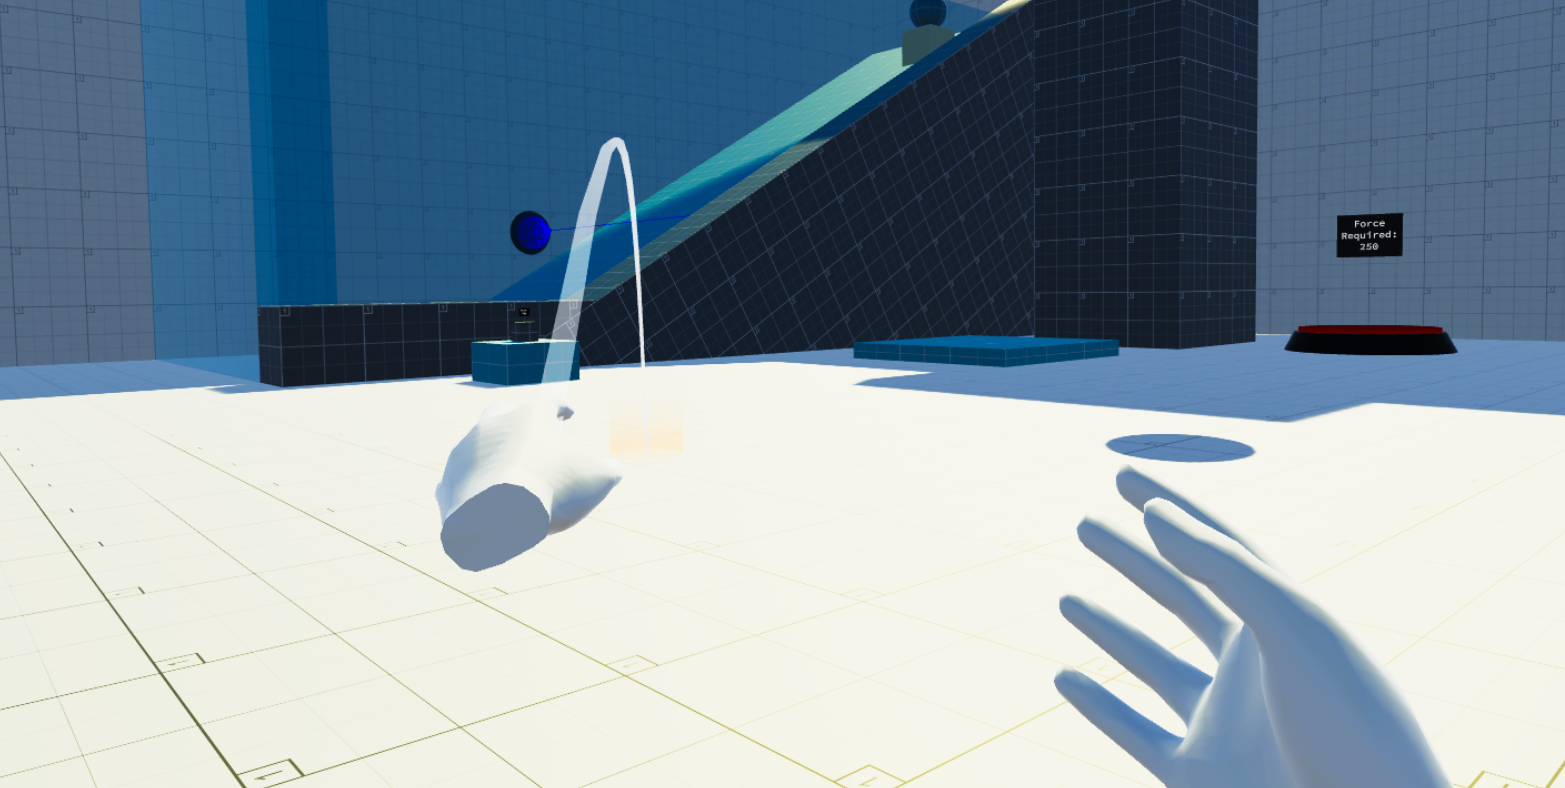
To create the player character, I began with the default player rig from the Unity XR Toolkit. The default rig allows you to pick up and put down objects, as well as move around on designated areas. While this is a good start, it needed plenty of work. Originally the player could grab objects from up to 10m away, which was changed to only letting them pick things up that their hands could physically touch. If the player tried to teleport with both hands at the same time, they could cover enormous distances extremely quickly, so I added a script that only lets one teleport reticle be active at a time. I then changed the reticles appearance to how you can see it in the image at the top of the page. To make sure that the user could move and throw objects around comfortably even with limited space, I gave the user the ability to hold down the trigger while holding an item. This would charge up a power bar, launching the object on release. This comes from the LaunchObject class. On the release of the trigger, the following method is used:
public void fire(){
    if (interactor.isSelectActive){
        powerBar.gameObject.SetActive(false);
        // Get the interactable that is currently selected:
        XRBaseInteractable heldItem = interactor.selectTarget;
        Rigidbody rb = heldItem.gameObject.GetComponent<Rigidbody>();
        interactor.allowSelect = false;
        // Deselect the interactable before launching:
        try{
            // Try to deselect the object:
            interactionManager.SelectExit(interactor, heldItem);
        } catch(NullReferenceException){
            // In the case that the user has already let go and a
            // NullReferenceException is thrown, return the users ability to select:
            StartCoroutine(resetSelect());
            return;
        }

        // Launch the object:
        rb.AddForce(transform.forward * currentPower, ForceMode.VelocityChange);

        StartCoroutine(resetSelect());

        // Reset values:
        currentPower = 0;
        heldItem = null;
        itemSelected(false);
        holdingToFire(false);
    }
}
While snippet doesn’t look like much, I find it quite interesting anyway. The first half of the code is all dedicated to making sure the object is still in the player’s hand, if it isn’t, the object isn’t launched (obviously) and the controller regains the ability to pick up other objects. Once the object has been launched, the ability to select items can’t be given back immediately, as the object would just be caught again, so we need the coroutine resetSelect(), to give the object some time to get out of the player’s hands before granting them the ability to grab again. In another thread, the system simply waits for one second before giving back the ability to grab.
private IEnumerator resetSelect(){
    yield return new WaitForSeconds(1f);

    interactor.allowSelect = true;
}
After finishing the launch object feature, as well as the rest of the grab mechanics, I moved on to prettying up the hands, by animating them. This took an extremely long time, as I had to animate each individual joint, frame by frame, for a full hand opening/closing animation. Moving 14 joints per frame, and moving them into convincing positions for each frame was pretty painful! There was also plenty of coding to sync the animations with the user’s button presses, but that’s not very interesting. You can see the result in the video. If you do want to see the scripts, you can find them in the repository here.
Special Relativity
Unity’s default physics were replaced with my own PhysicsController, as I needed to change the sizes, masses, and forces acting upon them in different ways. During the FixedUpdate() function - which is most useful for computing physics options - the values for gravity, Doppler shift, and the speed of light are taken from the menu where the user can change them, and are used to calculate the effects of all physics objects. Each physics object has a script that saves its values at rest, so they can be used in the functions to calculate their relativistic counterparts. First, the object’s RigidBody is used to apply gravity’s downward force, scaling with the different values that the user can set it to (0-25m/s2).
Next, we check of the object is moving, if it is, we apply the changes caused by length contractions and relativistic mass. We simply take the velocity of the object, and it’s rest mass, and use it to calculate the relativistic mass. For the calculating the length contractions, we actually cheat a little bit. Rather than scaling the contraction in the direction of movement, we do it in all directions uniformly. This is because during testing it felt very clunky and unpleasant to use, so I changed it. There are very few changes that need to be made to have the objects contract in their direction of movement. The calculation of the length contractions actually has a minimum cap of 1/3 of the object’s original size, as if it were any smaller, it would be very difficult to keep track of the object sometimes.
The Doppler shift effects were actually pretty difficult to get working. To get the objects to red & blue shift, I had to first check whether or not they were moving towards or away from the player. The way I did this was a pretty crude solution, but it worked nonetheless. The physics object’s position is checked against it’s position in the previous frame, and if the distance is larger than before, we assume the object is travelling away from us, and apply a red hue to the object’s specular component. If the distance is smaller than the previous frame, we assume the opposite, and apply a blue-violet hue. To scale how much each object’s colour would change, I was using the HSV colour space rather than RGB, I did this because it’s cyclical, so red and blue end up next to each other at the end. Unity’s colour selector displayed the colour space as a big circle, meaning that the blue-to-red transition was over the last 120° of the circle. So starting from the midpoint of 300°, there was 60° of red and 60° of blue to use. The speed that the object was going was proportioned into a range of 0-60, and then either added or subtracted from 300 - depending on whether the colour shift should be blue or red. The colour is then applied to the object’s hue value in its material. This was the difficult part. I had to get the material and mesh renderers to change the material properties for the objects, and then apply a Material Property Block to mask the changes onto the existing properties, I also had to have a way to reset them to default when they weren’t moving, so each object needed to store a copy of its original shader. After a good few days of tinkering, the methods that actually did the job were as follows:
public void setColour(Color col){
    if (materialPropertyBlock == null){
        materialPropertyBlock = new MaterialPropertyBlock();
    }
    // Set the colour to the MPB:
    materialPropertyBlock.SetFloat(specularHighlights, 1f);
    materialPropertyBlock.SetColor(specularID, col);
    float h, s, v = 0;
    Color.RGBToHSV(materialPropertyBlock.GetColor(specularID), out h, out s, out v);
    // Apply the propertyBlock to the renderers:
    foreach(Renderer rend in renderers){
        rend.SetPropertyBlock(materialPropertyBlock);
    }
    colourChanged = true;
}

public void resetColours(){
    if (materialPropertyBlock == null){
        materialPropertyBlock = new MaterialPropertyBlock();
    }
    // Set the colour to the MPB:
    materialPropertyBlock.SetFloat(specularHighlights, 1f);
    materialPropertyBlock.SetColor(specularID, defaultSpecular);
    float h, s, v = 0;
    Color.RGBToHSV(materialPropertyBlock.GetColor(specularID), out h, out s, out v);
    foreach(Renderer rend in renderers){
        // Apply the property to the renderer:
        rend.SetPropertyBlock(materialPropertyBlock);
    }
    colourChanged = false;
}
You can find the rest of this script here (it’s pretty messy). Compared to some of my other attempts, this really isn’t a lot at all. After the Doppler shift changes, the final part of the FixedUpdate() function checks if the object’s aren’t moving, and resets their size, mass, and material properties back to their defaults. This also happens if an object is grabbed by the user.
Levels
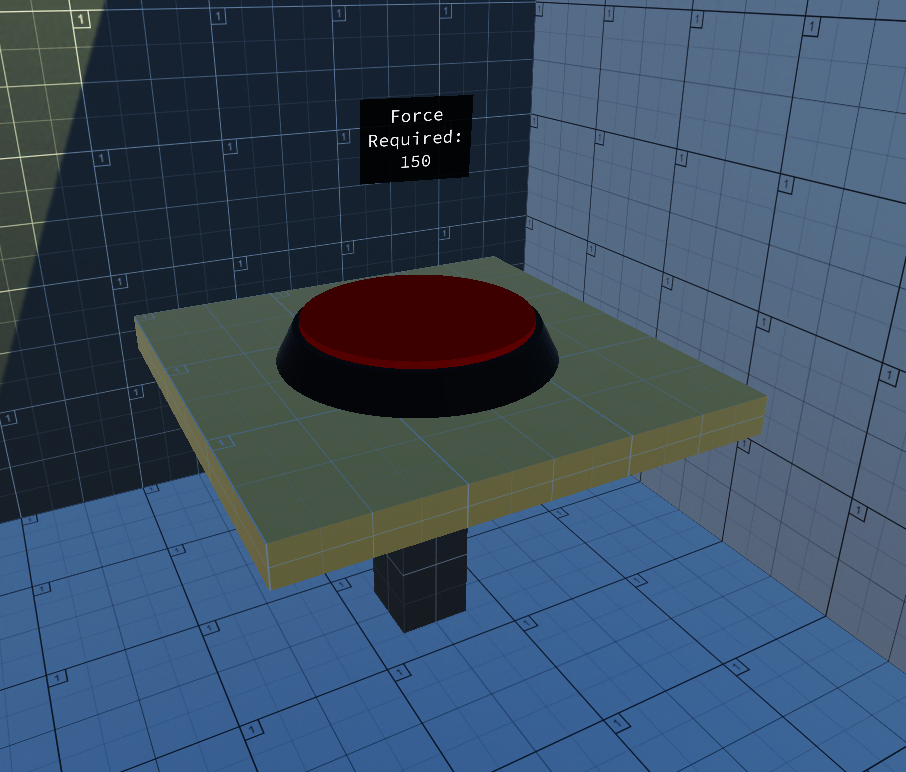
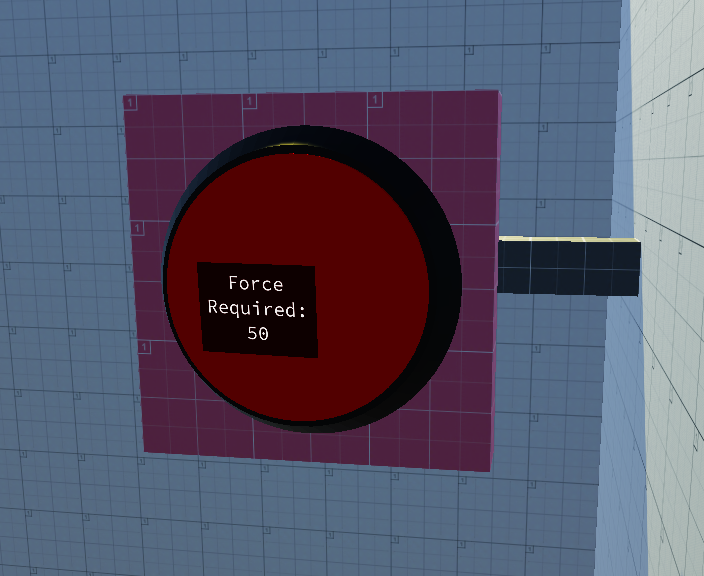
After a pretty long time, it came to the point where I had to start making the levels for the game, and stop just using the flat testing area I’d been using before. This meant I needed to come up with some ways of using the mechanics in an interesting way to allow the user to progress. The first idea I came up with was simply a button that required a certain amount of force to activate, meaning the 2kg box in the room might not be enough to activate the button that requires at least 25N of force. But if you increased the strength of gravity to say, 14m/s2, the box would exert 28N of force onto the button, activating it. I thought this was a nice simple way to get the user to start experimenting with the physics to see what they can do with it. The evolution of this would be a button on a wall, that wouldn’t be able to be trigger by just an increased gravity. The user would need to reduce the speed of light to cause the object’s relativistic mass to increase, and then throw it at the button to activate it. For the floor button, checking that the object is exerting enough force is easy enough, as gravity will be applying a force on it whether it’s moving or not. You can see this below:
if (!activated){
    // Get object that is interacting with the button:
    GameObject dynObject = collisionInfo.gameObject;
    // Check if the object colliding with the button is a valid interactable:
    if (dynObject.GetComponent<XRGrabInteractable>() != null){
        // Get the rigidbody belonging to the dynamic object:
        Rigidbody rb = dynObject.GetComponent<Rigidbody>();
        // Calculate the downward force it is exerting:
        Vector3 acceleration = dynObject.GetComponent<GetAcceleration>().getAcceleration();
        float downForce = rb.mass * Mathf.Abs(acceleration.y);

        if (downForce > forceRequired){
            activated = true;
            activateButton();
        }
    }
}
However, for the wall button, we can’t simply get it’s current speed. Once the object hits the button, it’s velocity in that direction stops dead, so the button won’t activate. This meant I needed to briefly store the object’s last velocity and/or acceleration so that the force against the button can be calculated. This is done in the GetAcceleration class, which stores the most recent acceleration the object was experiencing before stopping. This is actually also used in the floor button, but only to make it a little smoother when dropping it from a substantial height. We can then use the last acceleration from the object, along with the relativistic mass of the object, to calculate the force being exerted against the button. GetAcceleration doesn’t work very nicely with the LaunchObject function mentioned above. This is because LaunchObject applied an instantaneous velocity to the object, meaning Unity doesn’t actually count it as having accelerated at all. Due to this, when an object has been launched with this feature, its acceleration is almost always ~0, so the force can’t be calculated. To get around this, GetAcceleration also stores the last non-zero velocity of the object, allowing us to use that in the calculations instead if needed. You can see this in action here:
if (!activated){
    // Get object that is interacting with the button:
    GameObject dynObject = collisionInfo.gameObject;

    // Check if the object colliding with the button is a valid interactable:
    if (dynObject.GetComponent<XRGrabInteractable>() != null){
        // Get the rigidbody belonging to the dynamic object:
        Rigidbody rb = dynObject.GetComponent<Rigidbody>();

        Vector3 acc = dynObject.GetComponent<GetAcceleration>().getAcceleration();
        Vector3 vel = dynObject.GetComponent<GetAcceleration>().getLastVelocity();

        float force1 = Mathf.Abs(calculateForce(acc, rb.mass));
        // Calculate force with velocity in case LaunchObject is used:
        // Dampen it with a constant because it's a bit unfair if not.
        float force2 = Mathf.Abs(calculateForce(vel, rb.mass)) * 0.5f;

        if (force1 > forceRequired || force2 > forceRequired){
            activated = true;
            activateButton();
        }
    }
}
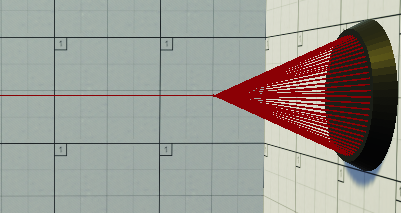
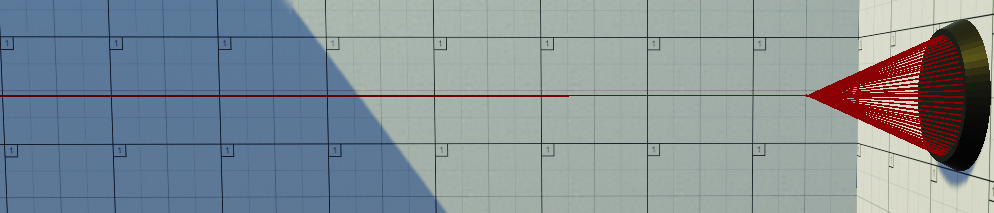
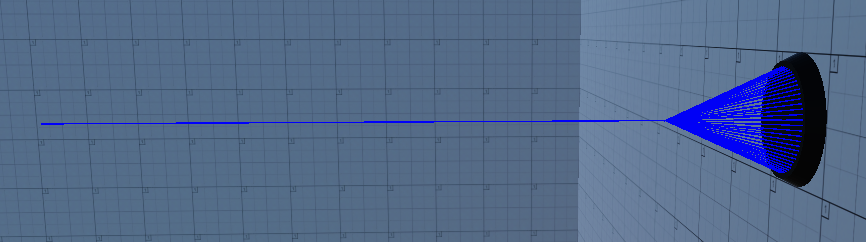
To get the player using Doppler shift, I decided to add a colour sensor, which is essentially just a ray that will detect whether the object is either red shifting or blue shifting. To create the sensor object, I used a LineRenderer component to create the coloured wireframe. To actually create the shape for the LineRenderer, you need to specify each vertex that should be used, to do this, I used made a cone mesh shape with Pro Builder, and pulled out its vertices in the script, and supplied them to the LineRenderer, you can see this in the snippet below.
IList<Vector3> vertices = mesh.positions;
Vector3[] positions = new Vector3[vertices.Count];
for(int i = 0; i < vertices.Count; i++){
    positions[i] = transform.TransformPoint(vertices[i]);
}

frameRenderer.positionCount = positions.Length;
frameRenderer.SetPositions(positions);
The actual sensing of the object’s colour shift is done across two classes; RenderLaser and DopplerSensorController. The former is more for aesthetic purposes, whereas the latter is more functional. The RenderLaser class takes in the laser’s max length (which can be supplied in the Unity editor), and fires a Raycast straight forward for however long the specified maximum distance is. The Raycast checks for any collisions with an object, and will return the position if there is one. The position is then used to render the sensor’s laser to stop at the collision point. In DopplerSensorController, the object responsible for the collision is recorded, and tested to make sure that it is an actual physics object; and not the player’s hand or a wall. The object’s material renderers are then pulled from the object, and the specular map of the materials are recorded, each one is queried to check if it should activate the sensor, and will then activate if it should.
void OnTriggerEnter(Collider other) {
    if (!activated){
        // Get the component that collided with the beam:
        GameObject collision = other.gameObject;
        // Find the interactable component within the object:
        XRBaseInteractable interactable = collision.GetComponentInParent<XRBaseInteractable>();
        if (interactable != null){
            // Get the game object:
            GameObject obj = interactable.gameObject;
            // Get the renderers in each object:
            Renderer[] rends = obj.gameObject.GetComponentsInChildren<Renderer>();
            Color[] colours = new Color[rends.Length];
            for (int i = 0; i < rends.Length; i++)
            {
                // Get the MPB's for each renderer:
                MaterialPropertyBlock mpb = new MaterialPropertyBlock();
                rends[i].GetPropertyBlock(mpb);
                // Get the specular map from the material:
                colours[i] = mpb.GetColor(specularID);

                float h, s, v = 0;
                Color.RGBToHSV(colours[i], out h, out s, out v);

                if (colours[i].r > 0.5f && h == 0){
                    h = 1f;
                }

                // If the hue is tending to red:
                if (h > (float)300f / 360f && redShift)
                {
                    activate();
                }
                else if (h <= (float)300f / 360f && h >= (float)240f / 360f && !redShift)
                {
                    // If the hue is tending to blue:
                    activate();
                }
            }
        }
    }
}
That was a lot of talking, but I found the development interesting, I hope you did too! There’s a video of the project in it’s entirety, if you’d like to see it you can click here. Thanks for reading!